Categories: Novice electricians, Electrician at home
Number of views: 265,623
Comments on the article: 9
How to install a power outlet. Detailed photo instructions for installing outlets
Before installing the outlet, you must turn off the circuit breaker in the electrical panel in the apartment or on the stairwell. In this case, you must make sure that it has worked and there is no voltage in the outlet. You can check this using a screwdriver indicator or a multimeter (see - How to use a multimeter).
To install the sockets, we need the following tools: level, knife, pencil, screwdriver, pliers, wire cutters.
Consider installation of a double outlet, where in one part it will be electric, and in the other a telephone jack.
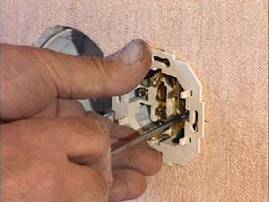
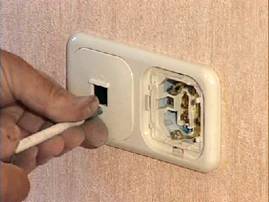
For ease of installation, the wires should protrude from the box by 50 - 80 millimeters. For strict horizontal installation of the outlet, using the level, mark on the sides of the place of internal mounting of the outlet. Having pulled out the wires, carefully clean their ends from the factory insulation. The bare ends of the wires, preferably not longer than 10 millimeters.
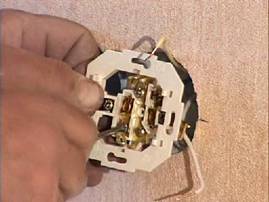
Modern wiring has three wires and is called a three-wire, one of the three wires is grounding, the other phase and the third neutral wire. The indoor unit of the outlet is equipped with three terminals, to which these three cores are connected.
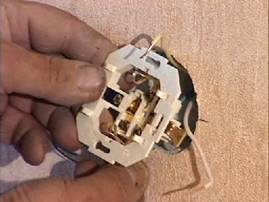
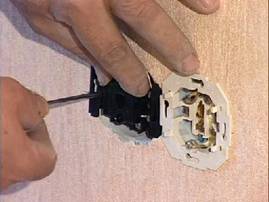
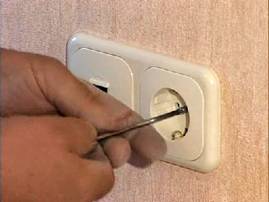
Checking that the wires are not intertwined under the outlet, we begin the installation, according to our markup. On the front side of the indoor unit, there are mounting screws. Alternately screwing these screws with a screwdriver, we begin to part the outer tabs mounted on the outlet.

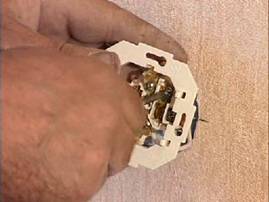
The paws diverge and abut either against a concrete wall or into a plastic walled-in insert, as in our case, and firmly fix the internal block of the outlet. Turning the screws one after the other allows for a smooth installation of the socket.
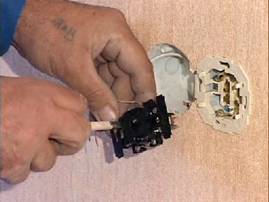
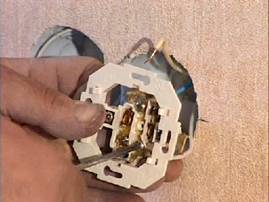
To install a telephone jack, you also need to strip the wires from the factory insulation and connect them to the three connectors of the telephone box itself, according to the notation printed on the front surface of the indoor unit. After connecting the wires, carefully fix the unit in the wall, according to our marking.
See more about this here: How to install and connect a telephone jack
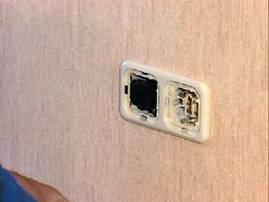
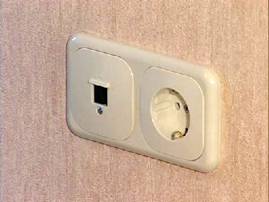
Combining both sockets will help us with a protective double edging and front panels.
In modern double or single blocks, the protective edging is latched onto the inner box, and the front panels are fastened with screws that are screwed into the inner block as well.
Thus, the entire structure of the outlet is held by the very paws that we tightened alternately. The trouble with all new settlers is the fact that, unlike the switch, a rather powerful force is applied to the outlet when pulling the plug from the outlet. And if the paws do not hold the internal unit of the socket well, then after a certain not so long time, the socket comes out of the wall, following the electric plug pulled out. Trouble is treated in one way.
If you install the outlet in a concrete wall and the mounting plastic insert is not installed in it, then do the following:
With some kind of tool, I advise with a chisel (of course it is a pity, but you can grind it later) or a chisel, make small indentations in the wall where the paws will rest. Then, when tightening them, they will fall into these recesses and securely fix the internal unit of the outlet in the wall.
If there is a plastic mounting insert in the wall, then in those places where the legs will rest on it, you need to use the same chisel to make cuts in plastic, that is, almost the same recesses. Recently, mounting inserts, thank God, began to be made inside corrugated and in them the legs have something to cling to.
That's all. Socket installed!
We advise you to read: Features of mounting sockets and switches on various surfaces, Armature for mounting sockets and switches. And another useful article on this topic -How to install a block of electrical switches with a socket
See also at electro-en.tomathouse.com
: